

Working at the Golden Keg, I’ve gotten to talk with a lot of brewers from wine to mead to beer and ale. And one thing I learn is that you can ask five brewers how to brew the same drink and get six different answers. So I decided I wanted to try it myself. And halfway through getting my supplies I realized “Huh, if I want to try my hand at brewing, maybe there are others who do too!”
There is a LOT of information out there and it can get REALLY overwhelming. But I’m going to walk you through what I’ve been doing, warts and all, so that you can try it yourself. It’s not as expensive to start as I thought it was.
(Author note: Because I really do want people to try this, I’m going to be breaking away from the Azeroth immersion just a little to help people find real-world equivalent. I am not sponsored. Any links I provide are NOT affiliate links. I don’t get one shiny copper from any of this, because that’s not my goal. If you try your hand, please hit me up. I am super friendly and social and would love to chat with you about your experience or help you trouble-shoot)

Here is what you need. Some of it is familiar, some of it not. Don’t let this intimidate you, we’re gonna walk through it.
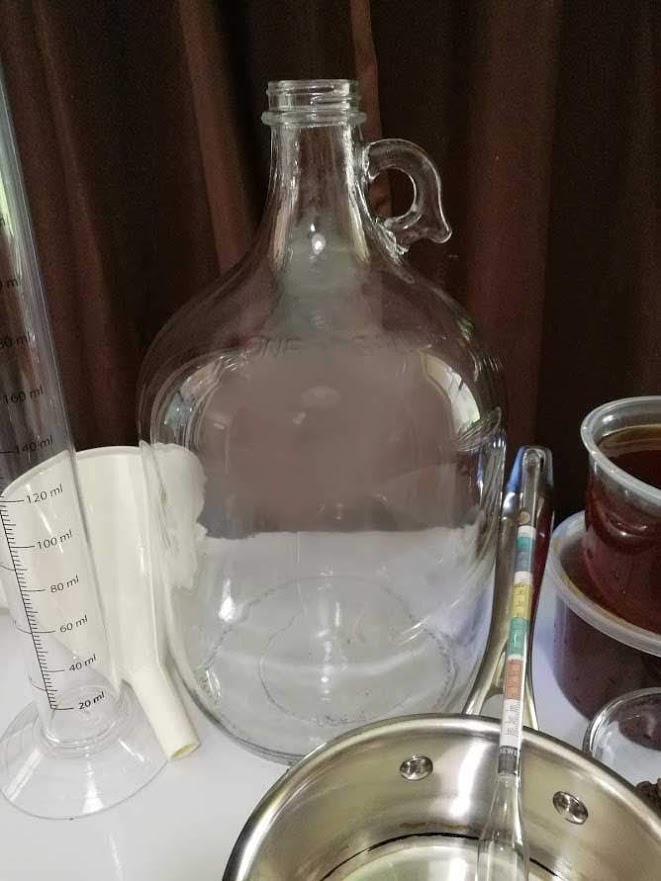
First is the most important part: The carboy.
Because I’m still learning and experimenting, I am making 1 gallon batches. If I start getting really good, I plan to increase to 5 gallon. But we’re not there yet.
A carboy is a fancy word for bottle. You know those old timey moonshine bottles? Yeah, basically that. Now, you can get these in the store in the wine section. They come with free wine, though honestly I don’t like the taste, and you can actually get THIS KIT cheaper on Amazon. Again, I’m not affiliated, this is just what I use.
This comes with a carboy, the bung and airlock, a pack of yeast (1 pack of yeast will make up to 5 1 gallon batches), and yeast nutrient. I don’t use the nutrient because I make my own, but it’s good to have for later if you decide you like this.
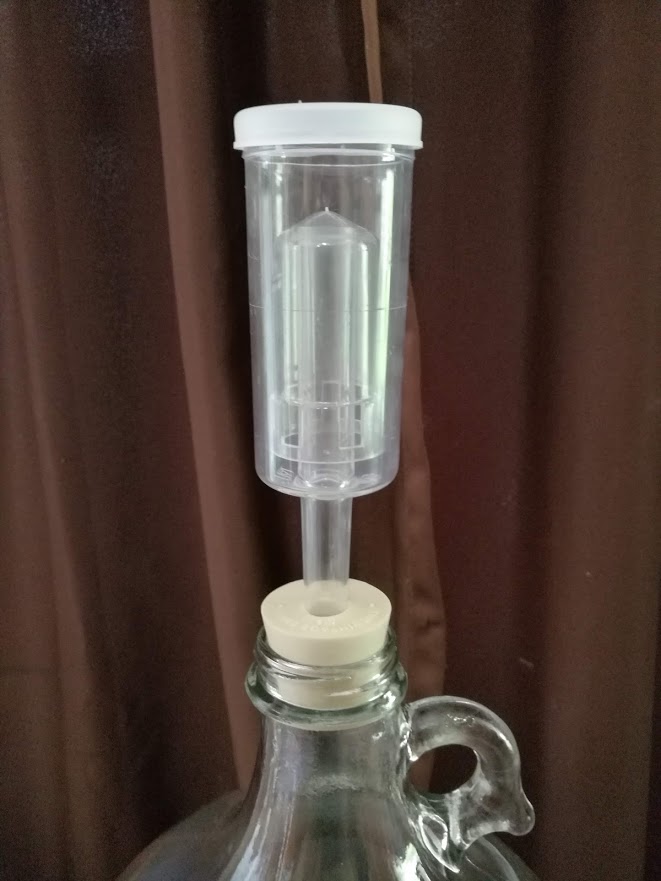
This is a bung and airlock. Basically it’s a stopper with a hole in it, and the airlock lets the carbon dioxide that comes from the yeast out, without letting anything nasty in. Yeast is a living thing, and when you ferment honey (or anything, really), it eats the sugar and lets out waste in two forms – alcohol and carbon dioxide. The carbon dioxide builds up and needs somewhere to go. When it’s in suspension, that creates the fizz, or carbonation. But when there’s too much, it creates bottle bombs. Like when you leave a bottle out somewhere hot and it explodes. Same idea. So the air lock allows the carbonation to come out and relieve the pressure, without letting any air or bugs into the booze.
Also airlocks and bungs are cheap on their own, so there’s no excuse not to use them. I’m talking less than $3 each and usually with Prime shipping.
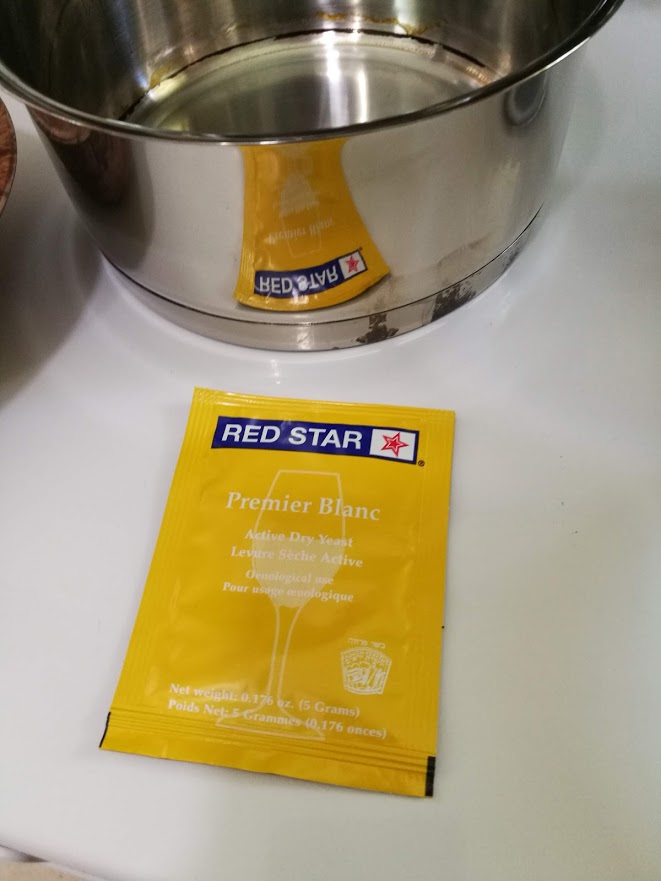
This is the yeast I use. It comes with the kit, so I might upgrade to a type more meant for mead later, but this has been doing the trick. You can use bread yeast but I don’t recommend it and this is why:
Remember how I just talked about how yeast releases CO2 and alcohol? Well, bread yeast is meant to make bread fluffy, so it is bred to release more air. Wine yeast is meant to create less CO2 and more alcohol, so less likeliness of bottlebombs or it making your wine taste weird.
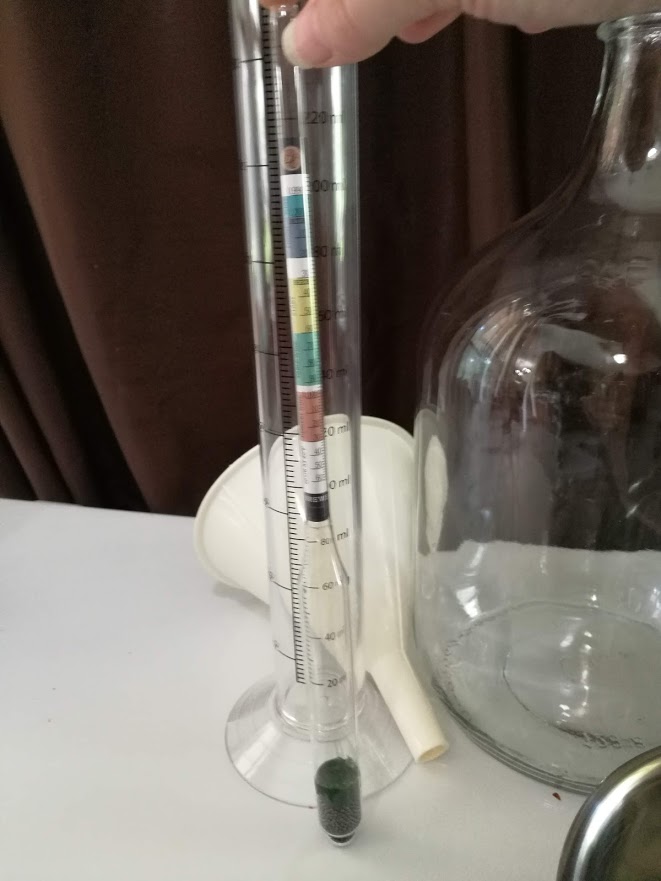
In order to tell just how alcoholic you’ve made your mead, you will also need a hydrometer. What this is is a simple tool that will tell you what the gravity of your alcohol is when you start and then again when you finish. Why is this important? With a simple calculation (that I will link later) you can find out what your alcohol level ends up being.
I recommend this one. It’s inexpensive and comes with it’s own cylinder, that mine didn’t so I had to wait an extra day to start. Whoops.
That’s about it for the special tools for now. We’ll touch on the others in a month.
Mead is a honey wine. So the main ingredient is going to be honey. For mine, I used three pounds (~1.5 kg) of honey to one gallon. I got mine from WinCo, they have it in bulk and it cost less than $9. You can also get it from Costco or Sam’s Club, I think they sell 5lb containers. Or, of course, get in touch with a local beekeeper. I’m currently working on that. Again, this is my first run, so I am not dumping a ton of money into something that I’m not sure about yet.
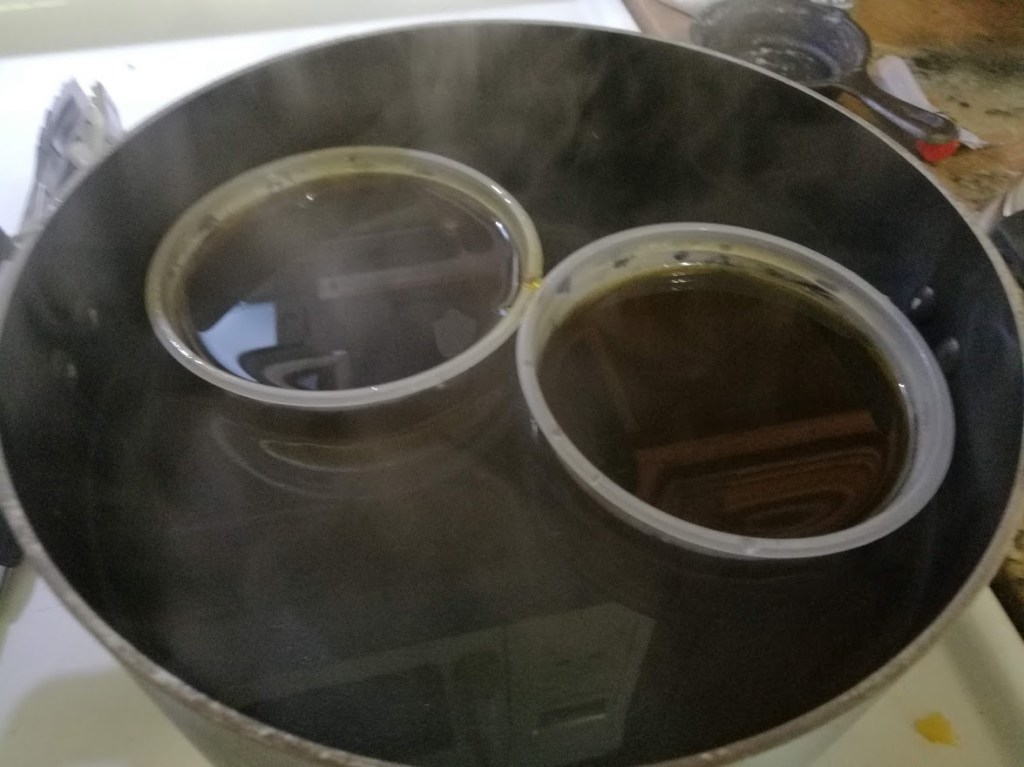
We want to get our honey into the carboy, so our first step is to heat it up to make it easier to pour. Fill a pot with water, bring the water to a boil, then take it off the heat and set your honey in it to warm up.
While that’s warming up, we’re going to hydrate our yeast to make sure it’s ready to work, and get our nutrient tea going.
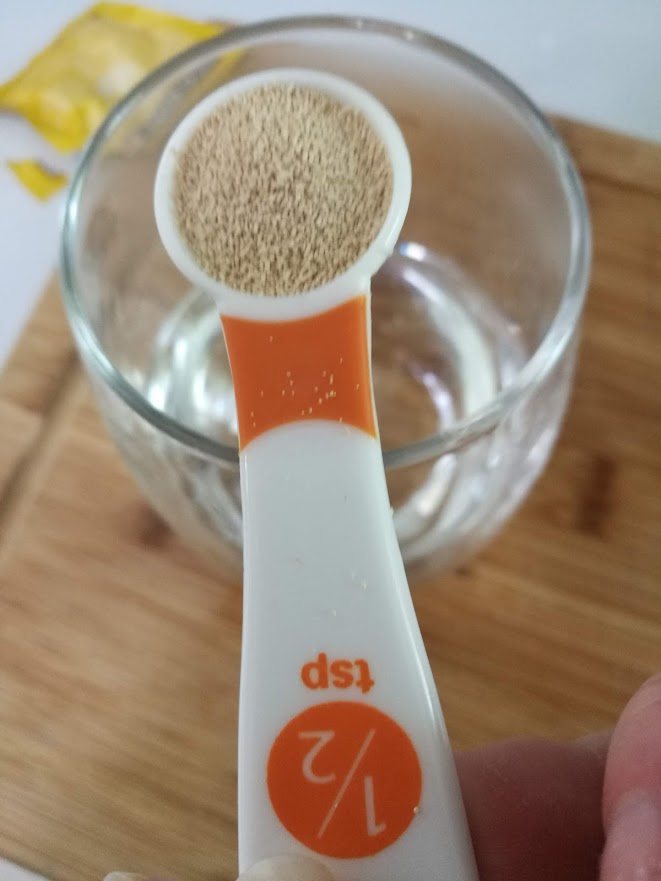
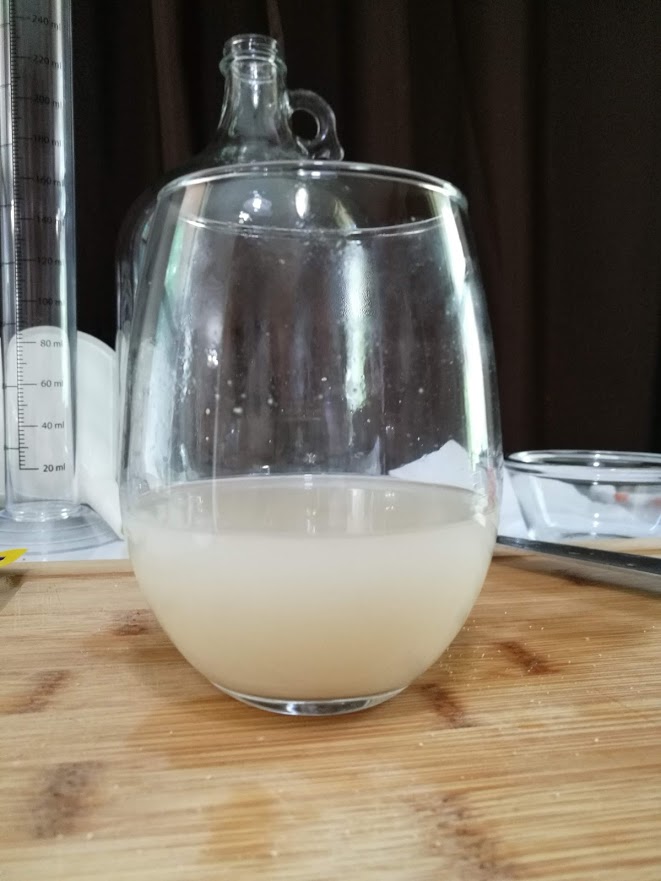
First the yeast. Use 1/2 teaspoon and put it in about a quarter cup of warm (NOT HOT) water. We’re just trying to hydrate it so that it’ll be dissolved and ready to start monching on the sugars.
Then, it’s time to start on our nutrient tea.
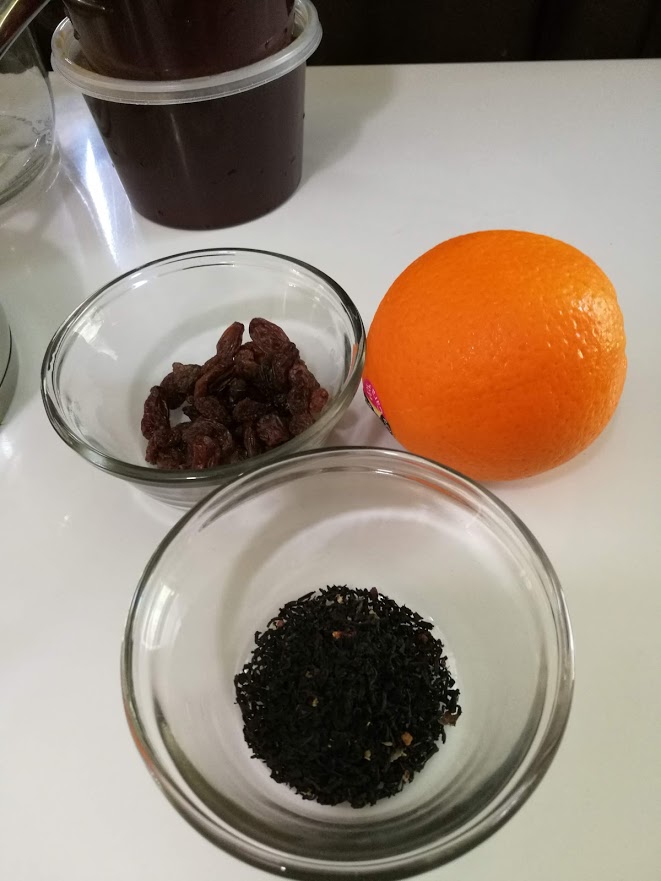
Remember how I said the kit came with a yeast nutrient? Well I don’t want to use that, I want to keep this as ‘traditional’ as possible, so we’re going to do things a little differently. I will be using the peel of half of an orange, about a handful of raisins, and about a tablespoon of loose, black tea. If you only have bags, that’s about two or three bags. It’s not super exact, don’t stress on this part.
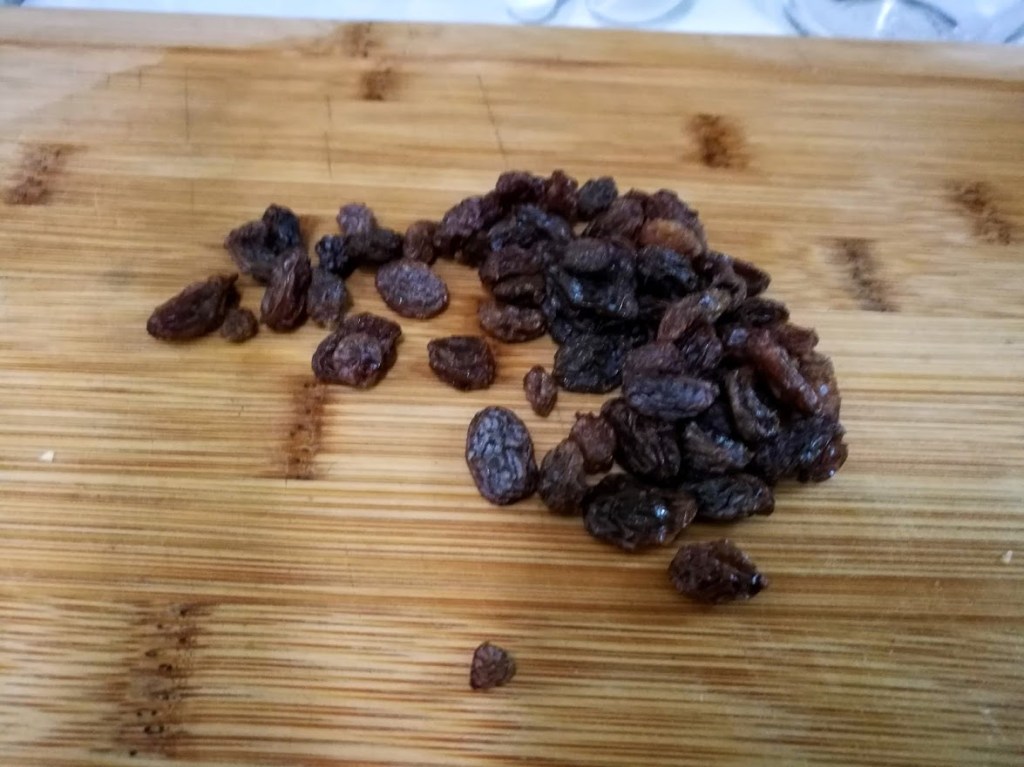
You want about this many raisins. Yeast LOVES raisins, it gives it a little extra sugar and the other foods it needs to really work super hard. Because otherwise, the yeast is going to be living on the equivalent of candy bars until its job is done. Fun, yes, but a recipe for disaster.
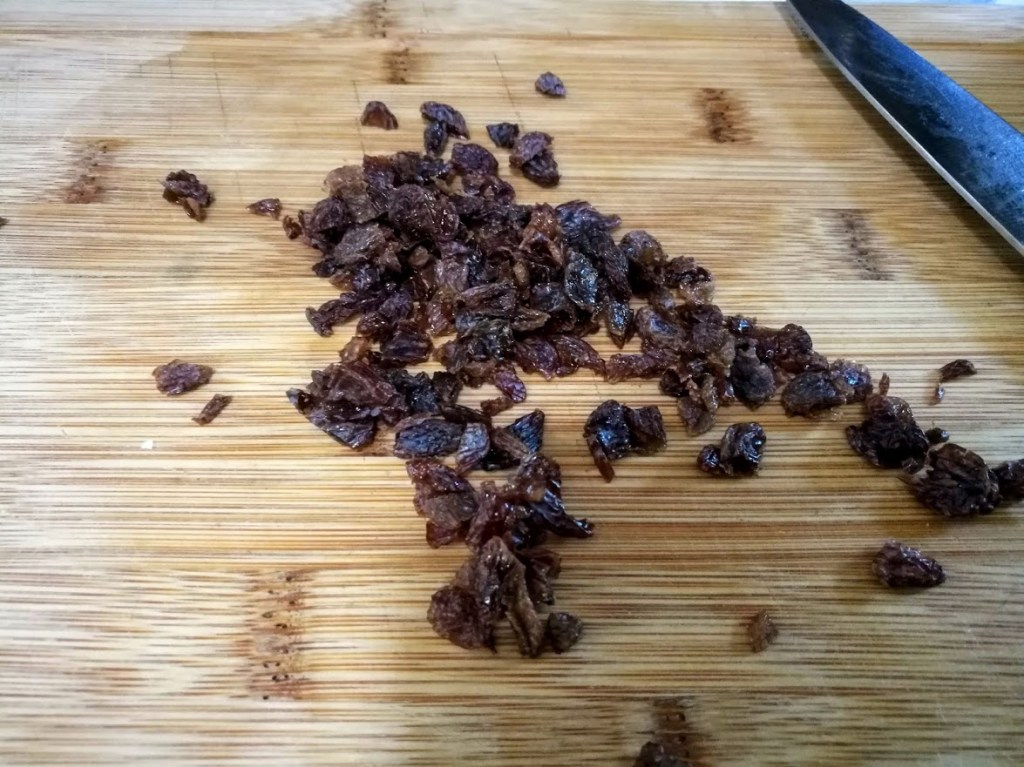
Chop them up kinda fine, so we can more easily get into the skin. Now for the orange.
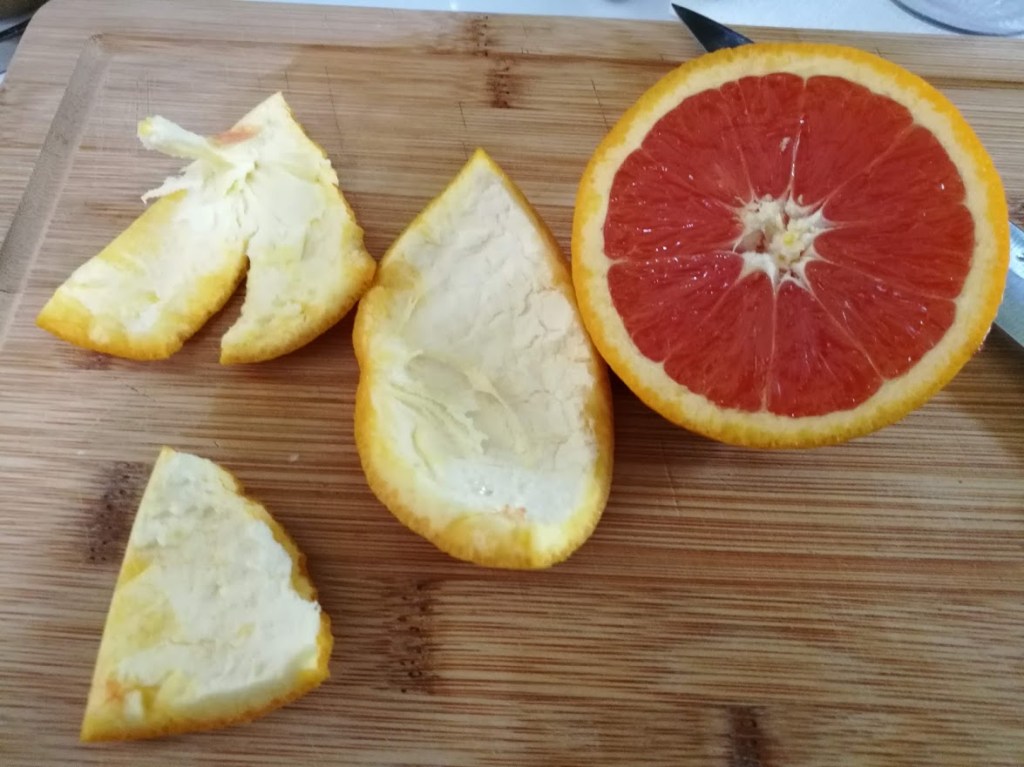
I grabbed a blood orange it seems. This was completely intentional. Yup. It’ll all do the same thing. Eat the yumminess out of it and keep the peels. The peels are the part we want for the mead.
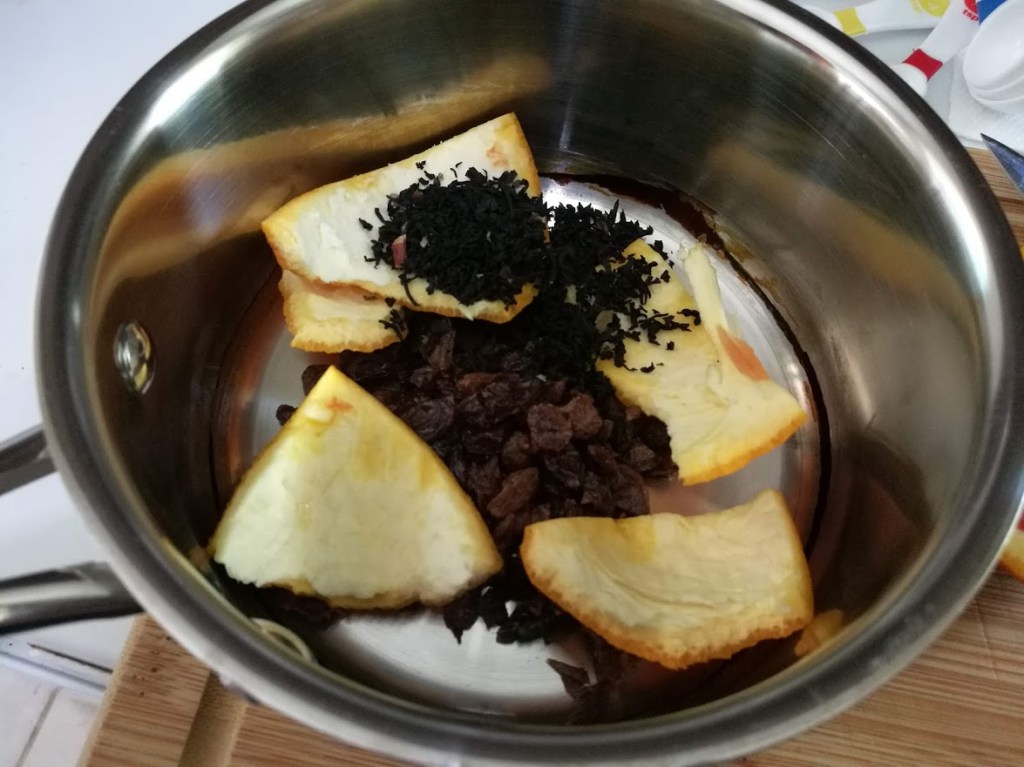
Then throw all of it into a pot. The tea has something in it called ‘tannins’ that are an astringent. This means that when you drink it, it’ll make a more complex feel on your tongue. It’ll make it fancier for minimum effort, is what I’m sayin’. Plus this is what the brewmaster told me to do.
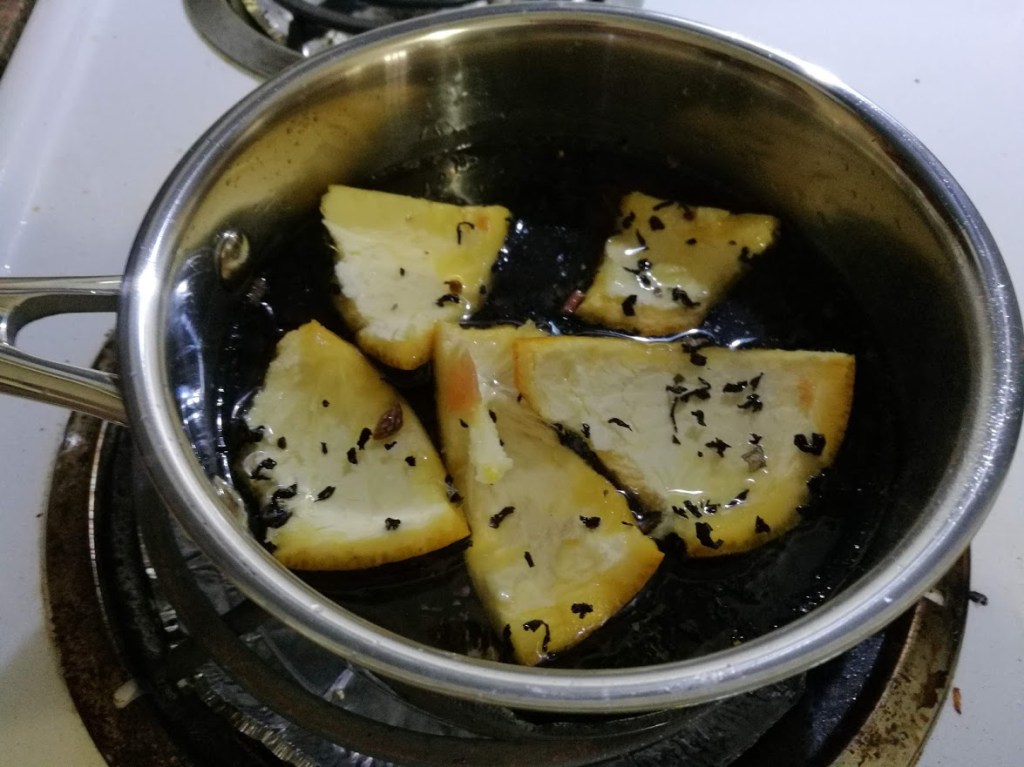
Add about a cup of water and bring it to a boil. Let it simmer for about 15 minutes. We’re trying to get it strong. This will actually make your kitchen smell pretty great.
So now we’re waiting on the tea to steep and the honey to warm up. It’s time for the MOST IMPORTANT STEP:
SANITIZE. EVERYTHING. This is going to be sitting in a closed area for a long time, any grody stuff that gets in there now is just going to get to keep sitting in there, turning into a big mutant monster.
Okay not really, but it’ll ruin your mead and do you really wanna lose all that time and effort and money? No, I didn’t think so.
I like StarSan, it’s easy to use and a little goes a long way. But for this batch I just used a cap of bleach in 2 gallons of water. Sanitize your funnel, sanitize the bung, sanitize the airlock (more on that in a minute), sanitize your hydrometer AND your cylinder, sanitize your carboy — if it’s going to be in contact with it, sanitize it. The tea itself has been boiled, so we’re not worried about that.
Everything clean? Your tea is steeped? Honey ready? Great, next step.
First, strain the tea and set it aside to cool down. Temperature is pretty important, you don’t want ANYTHING coming in contact with your yeast that is hotter than 120F/49C. This kills the yeast. Cold will make it sleep, but hot will make it dead.
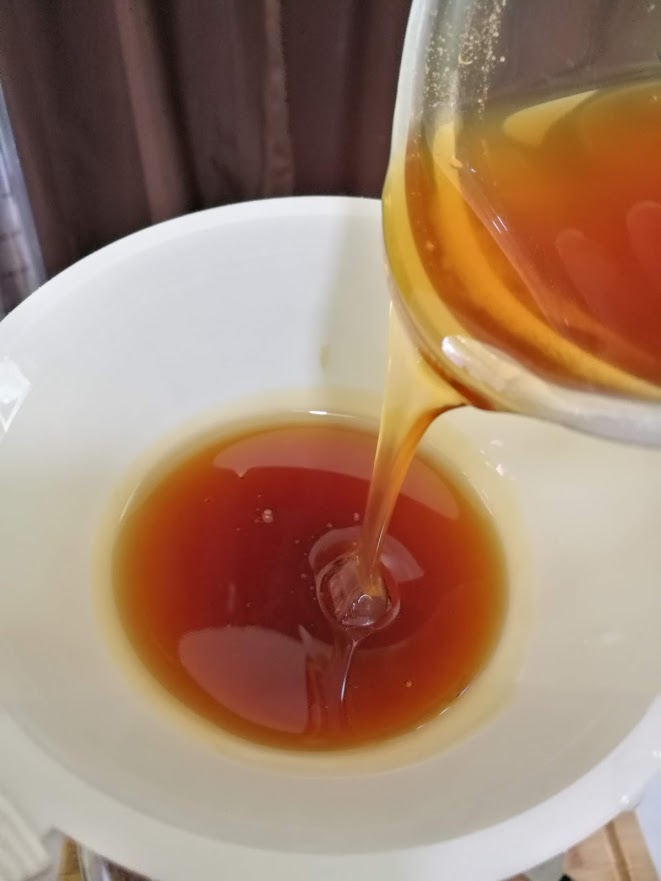
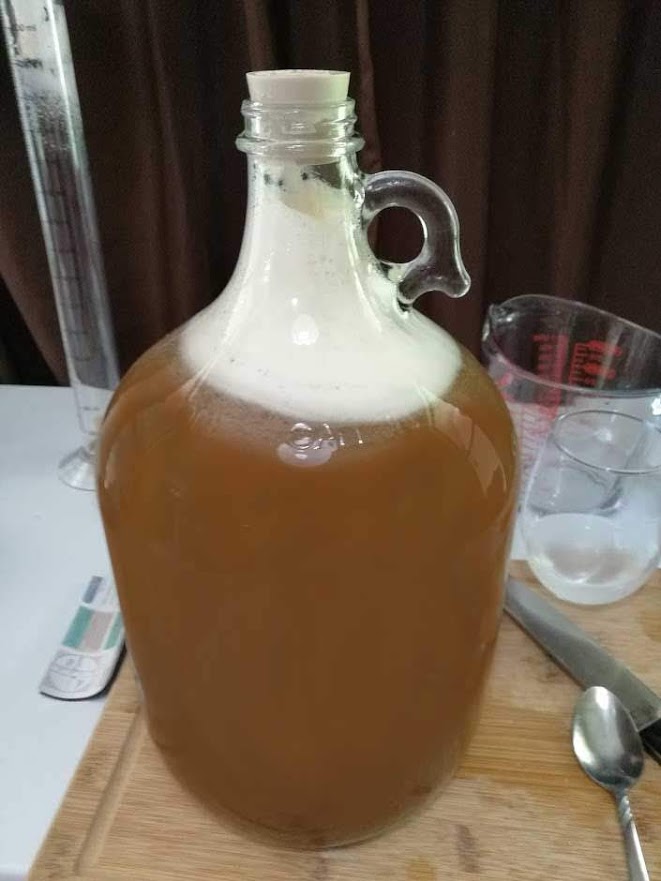
Now using the funnel, pour the honey into the carboy. Oh Light this part is just so weirdly pretty and I love it.
Get it all in there. All that sticky, delicious bee-vomit. Yum.
That is a LOT of honey… And every little bit is going to get used.

Fill it up about halfway with water and then shake the shit out of it. You’re trying to mix it up and get a lot of air in there. Early on, air is good for the yeast, so you want to pump as much as you can. But once it’s fermenting, air becomes the enemy. More on that later.
Make sure to cover the hole with your thumb if you’re using the bung. Release your thumb every now and then (with the bottle upright and not being shaken) to let some air escape.

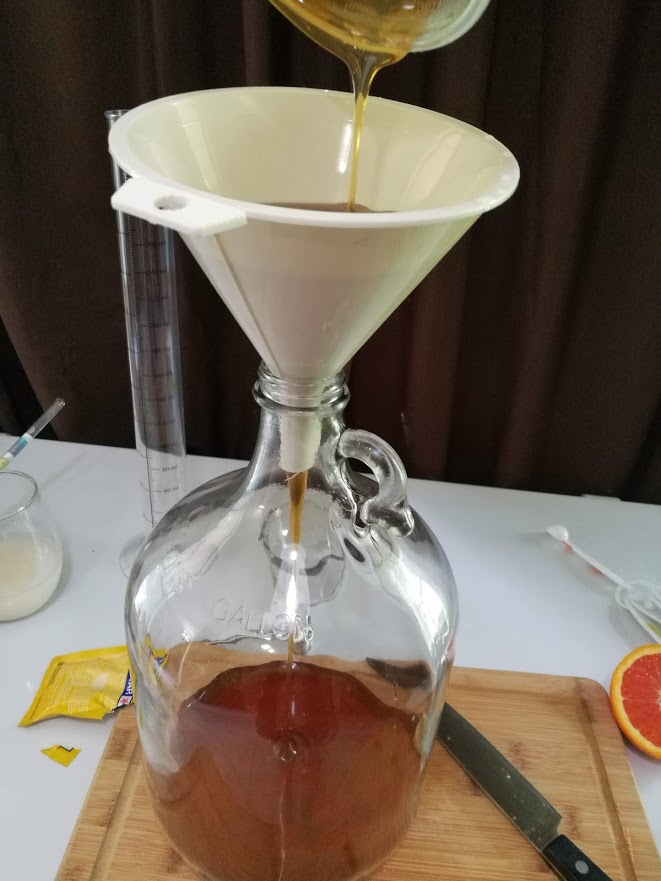
Once it’s cool, add the strained tea and more water to about the shoulders of the carboy. Shake shake shake shake shake!
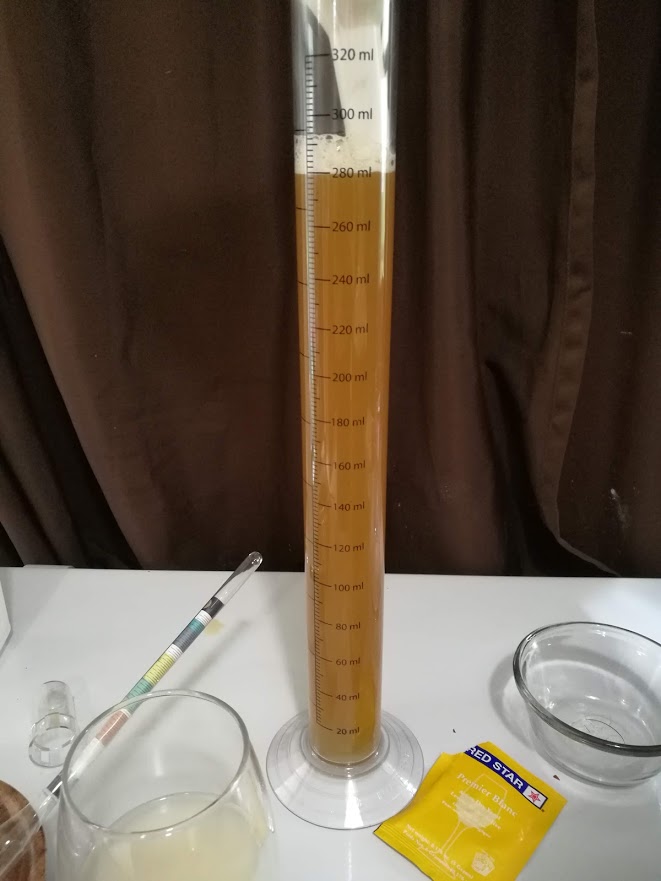
Now, before we pitch our yeast, we’re going to take a reading on the hydrometer. Fill your cylinder about 3/4 of the way full, and float your device in it. You’re looking for ‘SG’ or specific gravity. Make a note of what your original reading is. Mine was 1.111 to start. Remember, we’re going to take a reading when it’s done and figure out how alcoholic it turned out. Since I sanitized this, we can return it to the pitcher afterwards.
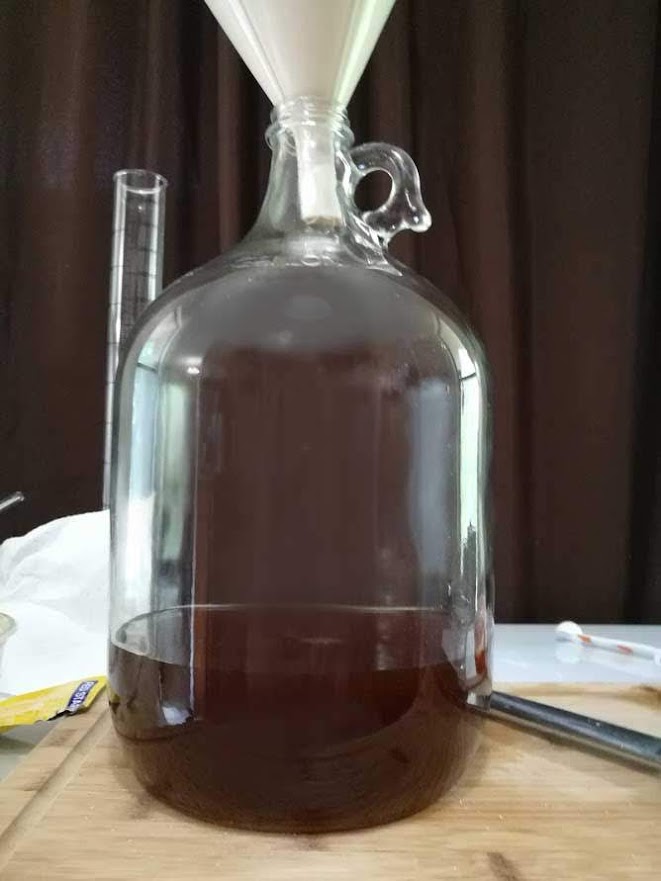
Our yeast is nice and hydrated, our baby mead (must) is cooled enough, so we’re going to go ahead and add it in.
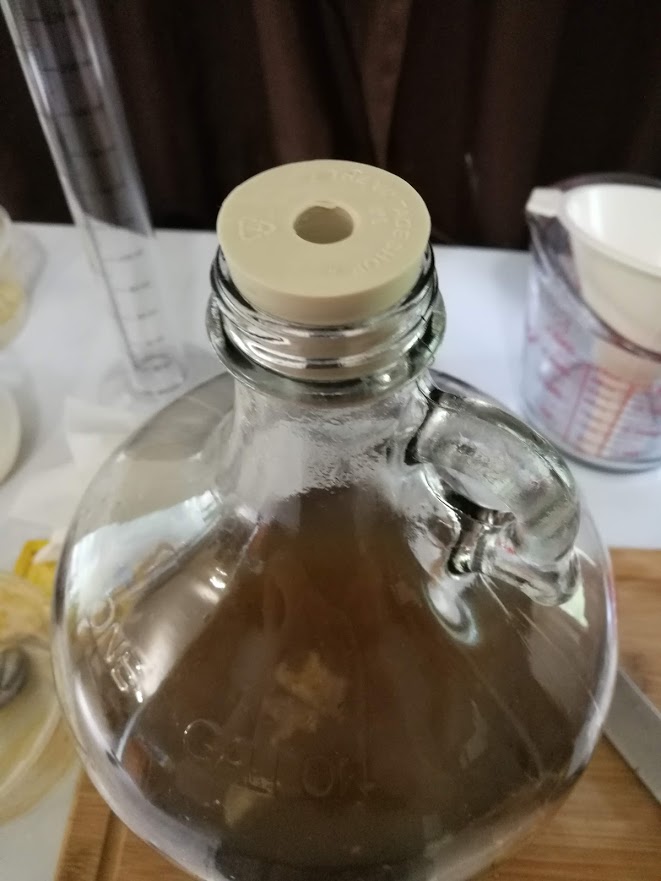
Put the bung in, and the airlock. The airlock needs to be filled with liquid, so how you do that is to put it all together, hold it under water until all the air is out, then lift it out of the water and allow it to drain. It will drain until pressure is equalized, right where you need it to be.
Stick that in the top, and put it somewhere cool and dark for a month.
Don’t worry if nothing happens in the first day. It took 48 hours before I started seeing bubbles. But oh man, it was so exciting to see it just chugging away.
And in a few weeks, I’ll provide some updates!
Tools:
Ingredients:
- 3 lbs honey
- Water to fill
- Peel of 1/2 orange
- ~ 1/4 cup raisins, chopped
- ~1 Tbsp black tea
- 1/2 tsp wine yeast (I used Red Star premier blanc, comes with the kit)
Instructions:
- Sanitize EVERYTHING. Either with StarSan, a 1 step cleaner, or a small amount of bleach in water
- Warm the honey to make it easier to pour
- Add the yeast to a small amount of warm water to hydrate
- Mix tea ingredients with 1 cup water and simmer for 15 minutes
- Add honey into carboy
- Fill halfway with water and shake to aerate
- Add the cooled tea and fill with more water to shoulders, shaking again
- Pour must into the cylinder and take a reading of it’s starting gravity.
- If sanitized, pour back into the must and add the yeast.
- Cover with a bung and airlock filled with sanitizer to equilibrium.
- Set aside for 1 month or until the bubbles have stopped for 1 week.
- Check back again after that time!
